[[trackingImage]]

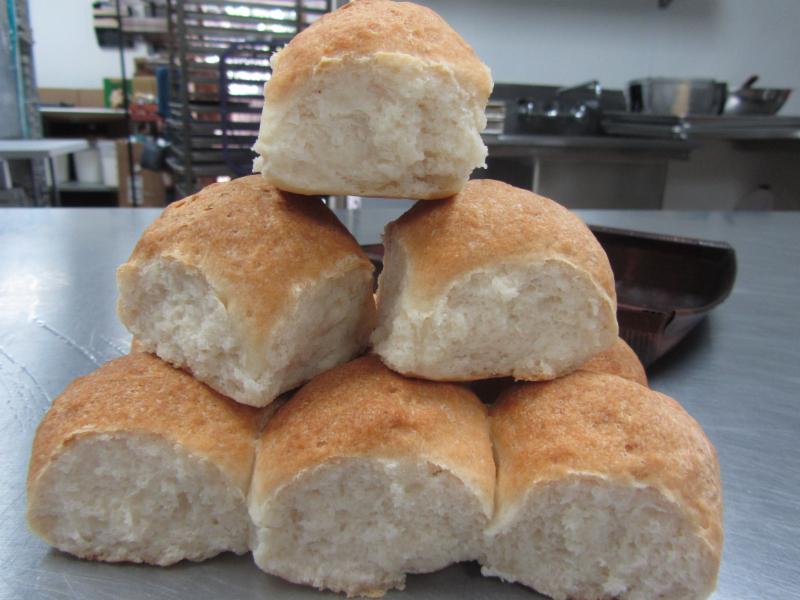
Dinner Rolls

Makes 16 pull-apart rolls

Ingredients

Dry Mix

  • 424 g Authentic Foods Bread Flour

Proofing Liquid

  • 400 g warm water, ideally about 105°F

Yeast Mix

  • 38 g granulated sugar
  • 7 g active dry yeast

Liquid Addition

  • 115 g hot water
  • ¼ teaspoon xanthan gum
  • 1½ teaspoons Ultra-Sperse M
  • 50 g margarine, melted

For Shaping & Baking

  • Nonstick cooking spray or oil, for shaping
  • Melted margarine, for brushing after baking


Equipment

  • Stand mixer with paddle attachment
  • Whisk
  • Small bowl
  • Kitchen scale
  • 9 × 9-inch baking pan
  • Parchment paper
  • Plastic wrap
  • Knife or pastry cutter
  • Pastry brush
  • Aluminum foil, for reheating if desired


Below is a link to Authentic Foods Bread Flour on Amazon

Make the Dough

1. Proof the yeast.

Fit the stand mixer with the paddle attachment.

Combine the warm water, sugar, and active dry yeast in the mixer bowl.

Mix on low speed for 1 minute.

Let the mixture stand for 15 minutes.

By the end of the rest, the yeast mixture should look bubbly and fluffy.


2. Measure the flour.

While the yeast is proofing, weigh 424 g Authentic Foods Bread Flour and set it aside.


3. Prepare the liquid addition.

Place the hot water in a small bowl.

While whisking, sprinkle in the xanthan gum and Ultra-Sperse M.

Continue whisking until both are dispersed and the mixture has thickened.

Whisk in the melted margarine.


4. Mix the dough.

Once the yeast mixture is bubbly and fluffy, add the liquid addition to the mixer bowl.

Mix on low speed for 1 minute.

Add the bread flour.

Mix on low speed for 1 minute, then increase to medium speed and mix for 2 minutes.

Cover the mixer bowl and let the dough rest for 20 to 30 minutes.

And once again:

Do not add more flour.


This is an extremely wet, sticky dough. That's intentional. The starches need that water.

It may not look like the bread dough you're accustomed to seeing.

That's okay.

Don't try to make this dough look more conventional by changing the recipe.

Prepare the Pan

5. Make a parchment sling.

Prepare a 9 × 9-inch baking pan with two wide strips of parchment paper.

Lay the first strip across the pan so it covers the bottom, comes up two opposite sides, and extends beyond the edges.

Lay the second strip across the pan in the opposite direction, forming a crisscross.

The bottom and all four sides should now be protected by parchment, with enough extending above the edges to give you handles later.

This parchment sling matters.


The finished rolls are going to bake together into one glorious sheet of bread, and those overhanging pieces of parchment will allow you to lift the whole thing straight out of the pan.

Shape the Rolls

6. Prepare your work surface.

Lightly coat your work surface and hands with nonstick cooking spray or oil.

This dough is very sticky, so don't be shy about refreshing the oil on your hands or work surface if you need it.

Don't solve the stickiness by working additional flour into the dough.


7. Make a square.

Turn the rested dough out onto the lightly oiled work surface.

Using your hands, gently pat it into a rough 6 × 6-inch square.

It doesn't need to be geometrically perfect. We're simply creating a reasonably even shape so it's easier to divide the dough into similarly sized portions.


8. Divide into 16 pieces.

Using a knife or pastry cutter, divide the square into 16 approximately equal pieces.

Think of it as a grid:

4 across × 4 down = 16 rolls.


9. Shape and arrange.

Working with one piece at a time, roll the dough into a ball.

Place each ball into the prepared pan.

When you're finished, you should have 4 rows of 4 rolls.

And yes:

The dough balls can be touching.


Don't spread them apart because you're worried they won't have enough room to rise. 

As long as they are evenly spaced in the pan, then they're exactly where they need to be.

These rolls rely on one another for support as they rise and bake. It’s ok if they're touching now, and they will definitely be touching as they rise.

Cold Rest

10. Refrigerate overnight.

Cover the pan tightly with plastic wrap.

Place the shaped rolls in the refrigerator for 4 to 12 hours, or overnight.

The rolls get their cold rest after they have been shaped and arranged in the pan.


Want to freeze them instead?

This is also the point where you can freeze the raw rolls.

Keep the shaped rolls tightly covered and freeze them for up to 7 days.

The night before you want to bake them, transfer the frozen rolls to the refrigerator and allow them to thaw overnight while still covered.


Once thawed, continue with the final proof below.

Proof & Bake

11. Give the rolls their final proof.

Remove the rolls from the refrigerator, uncover them, and place the pan in a warm spot.

Let the rolls proof for 1 to 2 hours, or until they have approximately doubled in size.

Because room temperature varies, pay attention to the rolls themselves rather than treating the clock as an absolute.

They should look noticeably larger, soft, and puffy.


12. Preheat the oven.

Toward the end of the proofing time, preheat the oven to 350°F.

Now we're going to do something that is basically the opposite of what we've done with nearly every other bread in this book:


Do not brush the rolls with margarine before baking.

Seriously.

Put the pastry brush down.

For these rolls, we want the surface exposed during baking so it can dry out.

The margarine comes later.

Trust the process.


13. Bake.

Bake at 350°F for 45 minutes.


When you pull the pan from the oven, you may look at the rolls and wonder what happened.

They'll be pale.

They may look dry.

They may look like something being served at a ghost feast.

This is completely normal.

We're not finished yet.

Now Comes the Butter

14. Brush immediately.

As soon as the rolls come out of the oven, brush them liberally with melted margarine.

And by liberally, we mean liberally.

This is not the time for restraint.


Brush the tops. Let the margarine run into the crevices between the rolls. Let it drip down the sides.

You want melted margarine pooling in those little spaces.


The hot, dry surface of the freshly baked bread will absorb it.

As that happens, the rolls will transform from their slightly alarming ghost-feast appearance into soft, buttery, delicious rolls with a beautiful golden color.

This is why we didn't brush them before baking.


15. Cool.

Let the rolls cool before eating.

Yes, we know what we just asked you to do.

Try.


16. Lift them from the pan.

Once the rolls have cooled, grab the overhanging parchment on opposite sides and lift the entire sheet of rolls straight out of the pan.

Remove the parchment.

Now you can pull the individual rolls apart and enjoy the soft sides that formed where they baked against one another.

Storing & Reheating

Once they're baked, these rolls are at their best the day they're made or the following day.


And here's where raw dough and baked bread behave very differently:

The raw, shaped rolls can be frozen. The baked rolls should not be.

We've tried freezing the finished rolls. They become mealy and gummy, and there's no good reason to do that to a perfectly innocent dinner roll.


Don't refrigerate the baked rolls, either.


Keep them at room temperature and enjoy them fresh.If you'd like to serve the rolls warm, cover the pan with aluminum foil and place it in a warm oven for approximately 5 to 10 minutes.


And if 16 dinner rolls disappear before dinner actually starts?

We have absolutely no troubleshooting advice for that.